
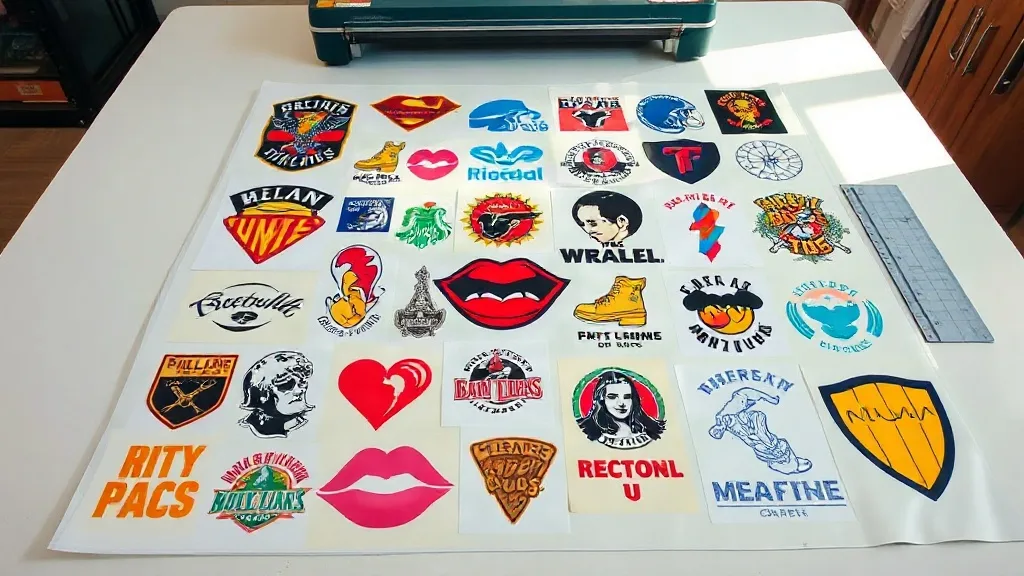
Most print shops treat a DTF Gangsheet like a digital junk drawer. You drag every pending design onto one long canvas, hit send, and hope the film doesn't jam. It works, sort of. But it also quietly bleeds money through wasted film, slower pressing, and reprints that eat your margin. The fix isn't a new printer or a bigger heat press. It's a smarter approach to how you build and use the sheet itself.
I've spent years watching small and mid-size shops wrestle with gangsheets. The ones who profit consistently treat the sheet as a production plan, not a parking lot. They nest designs with intent, group jobs by fabric and color, and leave breathing room where it matters. The result is less waste, faster fulfillment, and customers who come back because the product feels consistent. Here's how to get there without overhauling your whole operation.
Why the Gangsheet Is Your Real Profit Center
A gangsheet is simply a large film layout that holds multiple DTF prints at once. Instead of running one design at a time, you fill the sheet with everything queued for the day or week. On paper, it's about efficiency. In practice, it's where your cost per print is won or lost.
Film is not cheap, and neither is the powder or the press time. Every square inch you waste on a poorly nested sheet is money you don't get back. Shops that build tight, intentional layouts often report noticeably lower film consumption per order, which directly improves margin. More importantly, a clean sheet means fewer misprints, and fewer misprints mean fewer apologies and reprints.
The gangsheet also shapes your workflow. A well-organized sheet lets you press in batches, sort by garment color, and hand off finished pieces faster. That speed compounds. When you can promise a two-day turnaround instead of five, you win repeat business from the same customers who used to shop around.
Nesting: The Skill That Separates Pros from Hobbyists
Nesting is the art of arranging designs on the sheet so they use space efficiently without touching. It sounds simple until you try it with forty mixed-size logos and a deadline. The goal is to minimize gaps while keeping enough bleed and spacing for clean cutting and pressing.
Start with a size sort, not a design sort
Before you place anything, sort your print files by footprint. Large chest prints go in first, then medium logos, then small pocket or sleeve designs. Fill the big gaps with small pieces. This single habit prevents the classic problem of a sheet that looks full but has awkward dead zones around oversized art.
Respect the cut line and the press line
Leave a consistent border around each design. Too tight, and your cutter nicks the edge or the transfer curls during pressing. Too loose, and you waste film. A small, uniform gap works better than eyeballing it. Set a template in your layout software and stick to it, so every sheet has the same rhythm.
Group by garment color and fabric
This is where layout meets logistics. If a sheet holds prints for black tees and white tees, you'll spend extra time sorting and potentially pressing at different temperatures. Group designs by the blank they're destined for. Your press operator will thank you, and your error rate will drop.
- Keep white-ink-heavy designs together to balance powder usage.
- Separate jobs for dark and light garments to avoid temperature mix-ups.
- Cluster small add-on designs (sleeves, pockets) in one corner for easy cutting.
The Hidden Costs of a Sloppy Sheet
It's easy to underestimate how much a messy gangsheet costs. The visible waste is film. The invisible waste is time, morale, and customer trust.
When designs are crammed together, cutting takes longer. Your team hesitates, double-checks edges, and sometimes trims too close. That slows the whole line. When a print fails because it was too close to the sheet edge, you reprint, repress, and sometimes remake the garment. Multiply that by a busy week and the losses add up fast.
There's also the customer experience angle. A shop that ships consistent, clean prints builds a reputation. A shop that occasionally sends a crooked or peeling transfer doesn't get a second chance. The gangsheet is the first domino. Get it right, and everything downstream looks better.
A Practical Workflow for Building Better Sheets
You don't need expensive software to improve. You need a repeatable routine. Here's a workflow that works for shops running a few sheets a day or a few dozen.
- Collect and tag files the day before. Group orders by due date, garment color, and design size. Flag any file that needs a color profile check.
- Build the sheet in layers. Place large designs first, then medium, then small. Use a grid or spacing guide so gaps stay consistent.
- Do a dry run on screen. Zoom out and look for awkward gaps, tight edges, or designs that overlap cut lines. Fix them before printing.
- Print, powder, and cure in one pass. Keep the sheet flat and organized so the press operator can work left to right without hunting.
- Log what worked. Note the film length, design count, and any issues. Over time, you'll see patterns that help you plan better sheets.
This routine turns gangsheet building from a chore into a planning session. You start to see the sheet as a map of your day, not a random collection of files.
Matching the Sheet to the Blank
Your gangsheet doesn't exist in a vacuum. It feeds directly into the garment, and the garment affects how the print performs. A transfer that looks perfect on a 100% cotton tee might behave differently on a poly blend or a heavier fleece. That's why experienced shops match their sheet layout to the blanks they're using.
For example, if you're printing for a run of heavyweight tees, you might group those designs together and press them at a slightly higher temperature. If you're working with performance fabrics, you'll want to keep those prints separate and adjust your press settings. The gangsheet becomes a tool for batching by fabric, which reduces setup time and improves consistency.
This is also where blank selection matters. A reliable blank with consistent sizing and fabric content makes your gangsheet planning easier. When you know exactly how a shirt will behave, you can nest and press with confidence. Shops that standardize on a few trusted blanks often find their gangsheet workflow becomes more predictable and their reprint rate drops.
Small Tweaks, Big Margins
You don't need a complete overhaul to see results. Start with one change: sort your next gangsheet by size before you place anything. Then add a second: group designs by garment color. Within a week, you'll notice less film waste and faster pressing. Within a month, your team will wonder why you ever did it differently.
The gangsheet is one of the few places in a print shop where a small improvement in planning directly translates to profit. It's not glamorous, but it's effective. And in a market where margins are tight, effective is what keeps the lights on.
Frequently Asked Questions
How much spacing should I leave between designs on a DTF gangsheet?
A consistent gap of about 3 to 5 millimeters works for most shops. The key is uniformity. A template or spacing guide helps you keep it consistent, which makes cutting faster and reduces the risk of nicking edges.
Can I mix designs for different fabric types on the same gangsheet?
You can, but it's not ideal. Different fabrics often require different press temperatures and times. Mixing them on one sheet can lead to under- or over-curing. Group by fabric type whenever possible to keep pressing settings consistent.
What's the best way to handle small add-on designs like sleeve prints?
Cluster small designs in one corner or section of the sheet. This makes them easy to cut and keeps them from getting lost among larger prints. It also helps your press operator batch similar pieces together.
How often should I review my gangsheet layout process?
A quick review every few weeks is enough. Look at film usage, reprint rates, and pressing time. If you notice patterns of waste or errors, adjust your nesting or grouping habits. Small, regular check-ins prevent bad habits from becoming permanent.